Are you struggling to find the perfect gluten-free flour for your baking needs? Oats flour is an excellent choice that not only provides a delightful flavor but also offers impressive health benefits. In this comprehensive guide to gluten-free baking with oats flour, you’ll discover its nutritional advantages, practical tips, and mouthwatering recipes. Whether you’re looking for gluten-free pancakes, cookies, or bread, we have you covered—let’s get started!
What is Oats Flour and Why Should You Use It?
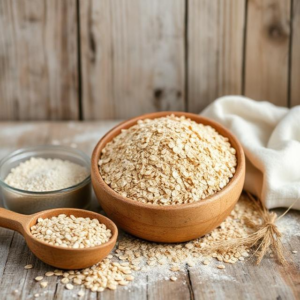
Oats flour is a finely ground flour made from oats, a naturally gluten-free grain. However, to ensure it’s safe for gluten-sensitive individuals, always opt for certified gluten-free oats to avoid cross-contamination. Here’s why oats flour should be a pantry staple for your gluten-free baking:
Nutritional Benefits of Oats Flour
- High in Fiber: Oats flour is packed with soluble fiber, helping to lower cholesterol and improve digestion. This makes it a great addition to health-focused diets.
- Rich in Protein: Offering more protein compared to many gluten-free alternatives, oats flour can aid muscle repair and support overall health.
- Loaded with Antioxidants: Oats contain compounds like avenanthramides that can help improve heart health and reduce inflammation.
- Vitamins and Minerals: Providing essential nutrients such as manganese, phosphorus, magnesium, and iron, oats flour can support energy production and overall well-being.
Additional Health Benefits
- Supports Weight Management: The high fiber content in oats flour can promote a feeling of fullness, which may help reduce overall calorie intake.
- Regulates Blood Sugar Levels: The fiber in oats can help stabilize blood sugar levels, making it a great option for those managing diabetes.
- Boosts Gut Health: The soluble fiber in oats acts as a prebiotic, nourishing the beneficial bacteria in your gut and contributing to better digestive health.
Before
After
Unlock the Power of Oats Flour: 10 Health Benefits You Didn’t Know
Oats flour is more than just a gluten-free alternative; it’s a powerhouse of health benefits that can enhance your diet. Here are 10 health benefits you might not be aware of:
- Supports Heart Health: Oats flour is rich in beta-glucans, a type of soluble fiber that has been shown to reduce bad cholesterol levels and improve heart health. Regular consumption can contribute to a lower risk of heart disease.
- Anti-Inflammatory Properties: The antioxidants in oats, particularly avenanthramides, have anti-inflammatory effects. This can be beneficial in reducing inflammation-related conditions, contributing to overall better health.
- Improves Skin Health: Oats are known for their soothing properties and can be directly applied in skincare. Oats flour can also be consumed to improve skin health from the inside out, thanks to its antioxidant content.
- Aids in Muscle Recovery: The protein content in oats flour supports muscle repair and recovery. This is particularly advantageous for athletes or anyone engaging in regular physical activity.
- Enhances Digestive Health: Beyond promoting gut bacteria health, the fiber in oats flour aids in regular bowel movements, helping prevent constipation and improving overall digestive health.
- Boosts Immunity: Oats flour contains beta-glucans, which can enhance immune response, helping the body fight off infections more effectively.
- Provides Sustained Energy: The complex carbohydrates in oats flour release energy slowly, making it an ideal choice for sustaining energy levels throughout the day.
- May Help Prevent Colon Cancer: Some studies suggest that the high fiber content in oats can lower the risk of developing colorectal cancer by promoting regular bowel movements and improving gut health.
- Helps Manage Stress: The magnesium in oats flour plays a role in reducing anxiety and regulating stress levels. Including it in your diet can contribute to better mental health.
- Weight Loss Support: The combination of protein, healthy fats, and fiber in oats flour can help regulate appetite and reduce cravings, making it a great addition to weight loss diets.
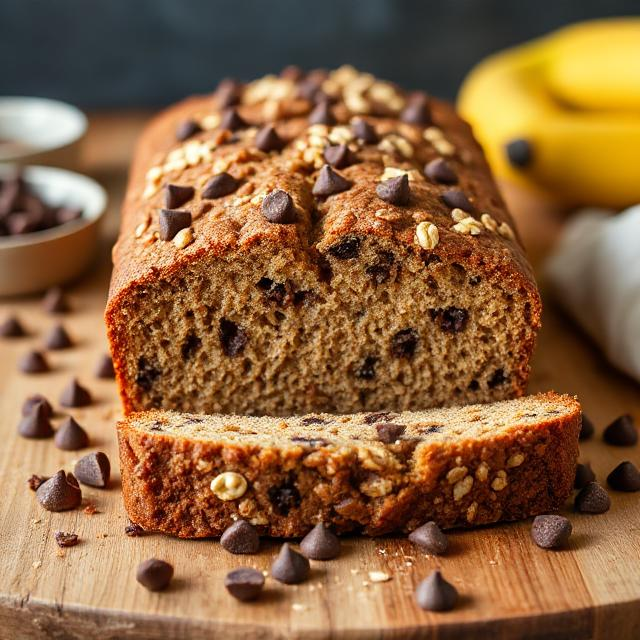
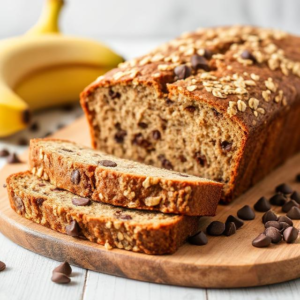
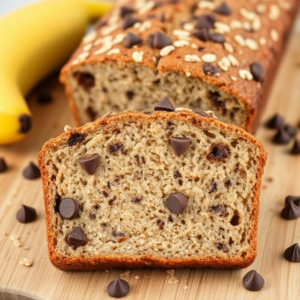
A Delicious Gluten-Free Oat Banana Bread Recipe
This Gluten-Free Oat Banana Bread is a delightful twist on the classic banana bread recipe, perfect for those following a gluten-free diet. Made with wholesome ingredients like oats, ripe bananas, and a touch of chocolate, it offers a comforting, sweet treat that’s easy to bake. With a warm aroma and a hint of cinnamon, this bread is sure to brighten your day.
Here are the ingredients with both gram and cup measurements:View Post
-
Oats Flour (Gluten-free Certified): 200g (approximately 1 3/4 cups)
-
Baking Soda: 1 tsp
-
Baking Powder: 1 tsp
-
Cinnamon Powder: 1/2 tsp
-
Powdered Sugar: 80g (approximately 2/3 cup)
-
Mashed Bananas (Ripe): 270g (approximately 1 1/4 cups mashed)
-
Room Temperature Eggs: 3
-
Coconut Oil: 55g (approximately 1/4 cup)
-
Vanilla Extract: 2 tsp
-
Room Temperature Milk: 80g (approximately 1/3 cup)
-
Semi-Sweet Chocolate Chips: 50g (approximately 1/4 cup)
-
Leftovers can be stored covered at room temperature on the counter for up to about 2 days. For longer storage (up to about 5 days), place slices in an airtight container or bag in the fridge. Warm slices in the microwave for about 10-15 seconds or use a toaster oven for a short time.
-
To freeze, tightly wrap the whole loaf in plastic wrap, then place it in a resealable bag and freeze for up to 3 months. Thaw at room temperature when you’re ready to enjoy it. Alternatively, wrap individual slices in plastic wrap and store them in a resealable bag. Thaw slices at room temperature or microwave for about 20-30 seconds when needed.
Comparing Oats Flour to Other Gluten-Free Flours
When exploring the world of gluten-free flours, oats flour holds its own against other popular options such as almond flour and coconut flour. Here’s how they compare:
| Flour Type | Flavor | Texture | Nutritional Highlights |
|---|---|---|---|
| Oats Flour | Mild, nutty | Chewy | High in fiber, protein, vitamins, and minerals |
| Almond Flour | Nutty | Moist | High in healthy fats, low in carbs |
| Coconut Flour | Sweet | Dense | High in fiber, low in protein, absorbs moisture |
Why Choose Oats Flour for Your Gluten-Free Baking?
Baking with oats flour offers numerous benefits to the home baker:
- Versatile Flavor: Its mild sweetness enhances both sweet and savory dishes, making oats flour suitable for pancakes, cookies, and even bread.
- High Moisture Retention: Oats flour retains moisture better than many gluten-free flours, ensuring softer and chewier baked goods.
- Easy Substitution: You can seamlessly substitute oats flour for conventional flour in many recipes, making the transition to gluten-free baking easier.
How to Substitute Oats Flour in Your Favorite Recipes
Transitioning to oats flour is simple! Here’s how to do it effectively:
- 1:1 Substitution: Use oats flour in place of all-purpose flour with minimal adjustments, though some recipes may require slight tweaking.
- Liquid Adjustment: Since oats flour retains moisture, consider reducing liquid ingredients in your recipe or adding additional binding agents.
- Combination Use: Blend oats flour with other gluten-free flours for unique flavors and textures.
Essential Tips for Gluten-Free Baking with Oats Flour
To optimize your gluten-free baking experience, follow these practical tips:
- Use Quality Ingredients: Always opt for certified gluten-free oats to prevent cross-contamination and ensure product safety.
- Measure Accurately: Baking requires precision; using a kitchen scale improves consistency in your recipes.
- Rest the Batter: Letting your batter sit for 10-15 minutes before baking allows the oats flour to absorb moisture, resulting in a better texture.
- Proper Storage: Store unused oats flour in an airtight container in a cool, dry space or refrigerate for added freshness.
- Mix Well but Don’t Overmix: While it’s essential to incorporate ingredients thoroughly, overmixing can lead to dense baked goods. Aim for just combined texture.
Delicious Gluten-Free Oats Flour Recipes
Ready to put oats flour to use? Here are more easy-to-follow recipes that cater to various tastes, perfect for anyone looking for gluten-free options.
1. Fluffy Oats Flour Pancakes

Ingredients:
- 1 cup oats flour
- 1 tablespoon baking powder
- 1 tablespoon sugar (optional)
- 1/2 teaspoon salt
- 1 cup milk (dairy or plant-based)
- Flax egg – one tablespoon of ground flaxseed and three tablespoons of water. Mix the ingredients in a bowl, let it sit for about five minutes, and then use it.
- 2 tablespoons melted butter or coconut oil
Instructions:
- Mix oats flour, baking powder, sugar, and salt in a bowl.
- Whisk together the milk, flax egg, and melted butter separately.
- Combine wet and dry ingredients until just mixed.
- Heat a non-stick skillet over medium heat and pour 1/4 cup of batter for each pancake. Cook until bubbles appear, then flip.
- Serve with your favorite toppings like fresh fruit or maple syrup.
2. Chewy Oats Flour Chocolate Chip Cookies

Ingredients:
- 1 1/2 cups oats flour
- 1/2 teaspoon baking soda
- 1/2 teaspoon salt
- 1/2 cup softened butter or coconut oil
- 1/2 cup brown sugar
- 1/4 cup granulated sugar
- 1 teaspoon vanilla extract
- Flax egg – one tablespoon of ground flaxseed and three tablespoons of water. Mix the ingredients in a bowl, let it sit for about five minutes, and then use it.
- 1 cup chocolate chips (dairy-free if desired)
Instructions:
- Preheat the oven to 350°F (175°C) and line a baking sheet with parchment paper.
- Combine oats flour, baking soda, and salt in a bowl.
- Cream together the butter, brown sugar, and granulated sugar until smooth. Add vanilla and flax egg, mixing well.
- Gradually add the flour mixture and fold in chocolate chips.
- Drop tablespoons of dough onto the baking sheet and bake for 10-12 minutes.
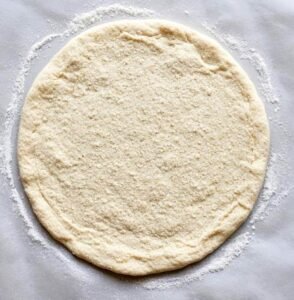
3. Oats Flour Pizza Crust
Ingredients:
- 2 cups oats flour
- 1 teaspoon baking powder
- 1/2 teaspoon salt
- 1 teaspoon dried oregano (optional)
- 1 cup water
- 2 tablespoons olive oil
Instructions:
- Preheat your oven to 400°F (200°C) and line a pizza stone or baking tray with parchment paper.
- In a mixing bowl, combine oats flour, baking powder, salt, and oregano.
- Gradually add water and olive oil, mixing until a dough forms.
- Press the dough out onto the parchment paper to form a pizza crust.
- Pre-bake for 10-12 minutes, then add your desired toppings and bake for an additional 10-15 minutes.
Frequently Asked Questions About Oats Flour
What is the shelf life of oats flour?
Oats flour generally lasts several months when stored properly. For extended use, refrigerate or freeze it. Be mindful of marking the purchase date for freshness.
Can oats flour be used for thickening sauces or gravies?
Absolutely! Oats flour is an effective thickening agent. Mix it with cold water to create a slurry, then incorporate it into your sauce for a smooth consistency.
Is oats flour gluten-free?
Yes, oats flour is naturally gluten-free. However, it’s important to use certified gluten-free oats to ensure safety for those with gluten sensitivities.
Can I make oats flour at home?
Yes! Simply blend rolled oats in a high-speed blender or food processor until fine. This homemade option ensures freshness and control over quality.
Can oats flour be used in savory baking?
Definitely! Oats flour is a fantastic option for savory baked goods as well, such as muffins, breads, and flatbreads. Its mild flavor pairs well with various herbs and spices.
How can I enhance the flavor of oats flour recipes?
Experiment with adding spices such as cinnamon, nutmeg, or ginger to enhance sweetness in baked goods. In savory dishes, adding garlic powder, onion powder, or herbs can elevate the flavor profile.
Enjoy the Benefits of Oats Flour in Your Gluten-Free Baking!
Baking gluten-free with oats flour not only offers a delicious alternative to wheat flour but also enables you to enjoy numerous health benefits. From tasty pancakes to delectable cookies and moist banana bread, oats flour is versatile and perfect for various recipes.
Whether you’re a seasoned gluten-free baker or just beginning your journey, using oats flour can enhance your culinary experience. Use the tips and recipes provided to explore the wonderful world of gluten-free baking.
Ready to Try Oats Flour?
Looking for high-quality Oats flour? Check out my favorite brand here and and start reaping the health benefits today!
More Gluten-Free Recipes to Try:
Chocolate Gluten-Free Chickpea Brownies
Embark on a transformative gluten-free journey with our Online Gluten-Free Bread Class! Clicking on the link opens the door to a world of gluten-free and egg-free magic and delightful learning. For our gluten-sensitive readers, this is not just a class; it’s a gateway to:
- Expert Guidance: Access step-by-step video tutorials led by seasoned experts, ensuring a thorough understanding of gluten-free bread making.
- Tailored for You: Learn techniques specifically crafted for those sensitive to gluten, ensuring a safe and enjoyable baking experience.
- Delicious Results: Master the art of creating gluten-free bread that’s not just dietary-compliant but also delicious, so you never have to compromise on taste.
- Community Connection: Join a community of like-minded individuals, sharing experiences and tips, making the learning journey interactive and supportive.
- Fun and Enjoyment: Baking should be fun! Experience the joy of creating mouthwatering gluten-free bread, adding a delightful touch to your culinary repertoire.
Join our Incredible Online (Paid) Gluten-Free Bread Class with Video Tutorials – Where the Egg-Free Magic Awaits! Don’t Miss Out on the Fun!
https://cookeryexpressions.co.in/gluten-free-breads-no-maida-no-atta-eggfree/
✨ Click here to watch the simple, step-by-step video tutorial for the Gluten-Free Grain Harmony Loaf and other amazing gluten-free bakes. Let’s bake up some joy together!
https://www.facebook.com/groups/glutenfreebakingmasterycommunity/