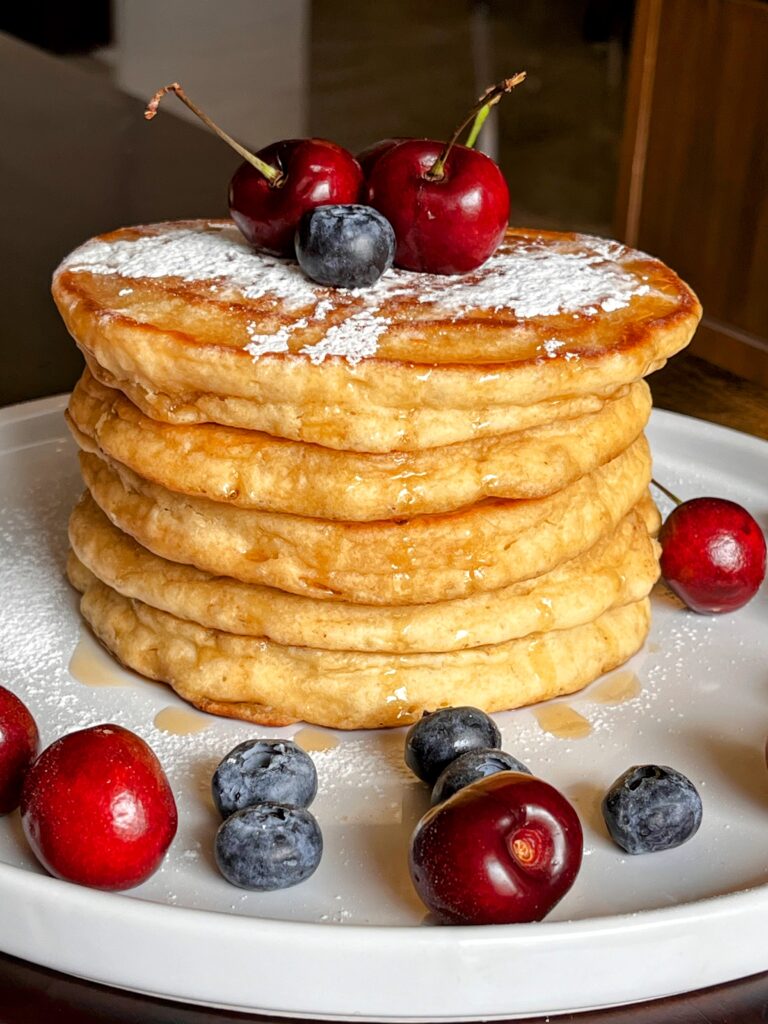
Indulge in the goodness of our Soft & Fluffy Gluten-Free Pancakes – the perfect start to your day! We’ve combined rice flour, oat flour, and almond flour for that light, airy feel. A touch of brown sugar adds sweetness, and they’re cooked to a golden perfection. Light, airy, and oh-so-good! ![]() Top it off with maple syrup or your favorite berries for a delightful treat!
Top it off with maple syrup or your favorite berries for a delightful treat!
Ingredients:
Room Temperature Milk: 345gms
Apple Cider Vinegar: 1 tbsp
White Rice Flour: 120gms
Gluten Certified Oat Flour: 50gms
Blanched Almond Flour: 50gms
Potato Starch: 145gms
Xanthan Gum: ½ tsp
Pink Salt: ½ tsp
Baking Powder: 2 tsp
Baking Soda: ½ tsp
Brown Sugar: 50gms
Melted Butter: 60gms.
Room Temperature Eggs: 2
Vanilla Essence: 2 tsp
Notes:
Please note that Weights (in grams) are often more precise for baking.
Method:
1. Warm the milk in the microwave for 20 seconds.
2. Add apple cider vinegar. Mix well and set aside for 10 minutes.
3. In a big bowl, sift together – white rice flour, gluten-free oat flour, almond flour, potato starch, xanthan gum, salt, baking powder, and baking soda.
4. Add brown sugar to the mix.
5. Whisk with a wire whisk for 2 minutes until everything is well combined.
6. In another bowl, add – buttermilk (milk + apple cider vinegar mix), melted butter, eggs, and vanilla.
7. Whisk for 3 minutes.
8. Pour the wet ingredients into the dry mix and stir well with a spatula until combined.
9. Let the batter rest for 10 minutes to let the flours soak up the liquid.
10. Heat a non-stick pan on medium heat, lightly grease it with a bit of butter.
11. Pour ⅓ cup of batter for each pancake.
12. Cook until bubbles appear on top ( 2 to 3 mins), then flip and cook for 1-2 more minutes until golden brown.
13. Avoid pressing your pancake with the spatula! After flipping, allow them to be, and you’ll achieve a taller, fluffier pancake.
14. Repeat with the remaining batter, adding more butter as needed.
15. Serve the gluten-free pancakes warm with your favorite toppings like maple syrup, fresh berries, or whipped cream.
Tips for Making the Perfect Gluten-Free Pancakes
- Use a non-stick pan or griddle to prevent the pancakes from sticking.
- Let the batter rest for a few minutes before cooking to allow the ingredients to fully combine.
- Use a 1/3rd measuring cup to pour the batter onto the pan for evenly sized pancakes.
- Don’t flip the pancakes too early. Wait until bubbles form on the surface before flipping.
- Use a spatula to gently press down on the pancakes while cooking to ensure they cook evenly.
- Don’t overcrowd the pan. Leave enough space between each pancake for easy flipping.
Storing: To store these pancakes, let them cool completely. Place them in an airtight container, separating each pancake with parchment paper to prevent sticking. Store in the refrigerator for up to 2-3 days. For longer storage, you can freeze them by placing parchment paper between each pancake and storing them in a sealed freezer bag for up to 1-2 months. When ready to eat, reheat in a toaster or microwave until warmed through.
Remember to tag me and share your mouth-watering creations! Your photos and experiences are not just culinary delights but an inspiration to me! Feel free to reach out via DM to share your thoughts and experiences with this recipe. Let’s continue making gluten-free baking a joyous and flavorful journey together! Enjoy every bite of this gluten-free Pancakes!
Embark on a transformative gluten-free journey with our Online Gluten-Free Bread Class! Clicking on the link opens the door to a world of gluten-free and egg-free magic and delightful learning. For our gluten-sensitive readers, this is not just a class; it’s a gateway to:
- Expert Guidance: Access step-by-step video tutorials led by seasoned experts, ensuring a thorough understanding of gluten-free bread making.
- Tailored for You: Learn techniques specifically crafted for those sensitive to gluten, ensuring a safe and enjoyable baking experience.
- Delicious Results: Master the art of creating gluten-free bread that’s not just dietary-compliant but also delicious, so you never have to compromise on taste.
- Community Connection: Join a community of like-minded individuals, sharing experiences and tips, making the learning journey interactive and supportive.
- Fun and Enjoyment: Baking should be fun! Experience the joy of creating mouthwatering gluten-free bread, adding a delightful touch to your culinary repertoire.
Don’t miss out on this opportunity to turn your kitchen into a gluten-free haven – click the link and let the egg-free magic unfold!
Join our Incredible Online (Paid) Gluten-Free Bread Class with Video Tutorials – Where the Egg-Free Magic Awaits! Don’t Miss Out on the Fun!
https://cookeryexpressions.co.in/gluten-free-breads-no-maida-no-atta-eggfree/
✨ Click here to watch the simple, step-by-step video tutorial for the Gluten-Free Grain Harmony Loaf and other amazing gluten-free bakes. Let’s bake up some joy together!
https://www.facebook.com/groups/glutenfreebakingmasterycommunity/