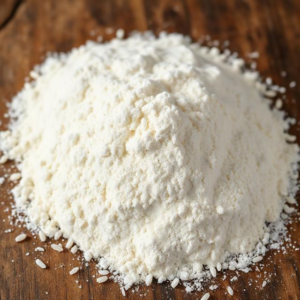
When it comes to gluten-free baking, finding the right flour can feel overwhelming. With countless options available, it’s essential to choose the right one that suits your taste, dietary needs, and baking goals. In this guide, we’ll focus on White Rice Flour, a versatile ingredient in gluten-free baking that offers unique properties and benefits.
Whether you’re looking to replace traditional flours or explore new baking horizons, this comprehensive guide will provide actionable insights.
Why Choose White Rice Flour for Gluten-Free Baking?
Before
After
White rice flour is made from finely milled white rice and is a staple in many gluten-free kitchens. It serves as a great alternative to wheat flour, particularly for those with celiac disease or gluten intolerance. But what makes white rice flour so special?
Health Benefits of White Rice Flour
- Naturally Gluten-Free: As a grain derived from rice, white rice flour is naturally gluten-free. This means it’s safe for individuals with gluten sensitivities or celiac disease.
- Easy to Digest: Compared to some other gluten-free flours, white rice flour is easier on the digestive system, making it suitable for those with digestive issues.
- Rich in Carbohydrates: It offers a great source of energy due to its high carbohydrate content, making it an excellent choice for athletes and active individuals.
- Versatility: White rice flour can be used in various recipes, from baked goods like cakes and cookies to savory dishes like dumplings and pancakes.
The Nutritional Profile of White Rice Flour
- Calories: Approximately 130 calories per 100 grams
- Carbohydrates: About 28 grams
- Protein: Roughly 2 grams
- Fat: Less than 1 gram
These attributes make white rice flour an appealing option for many home bakers looking to reduce gluten in their diets.
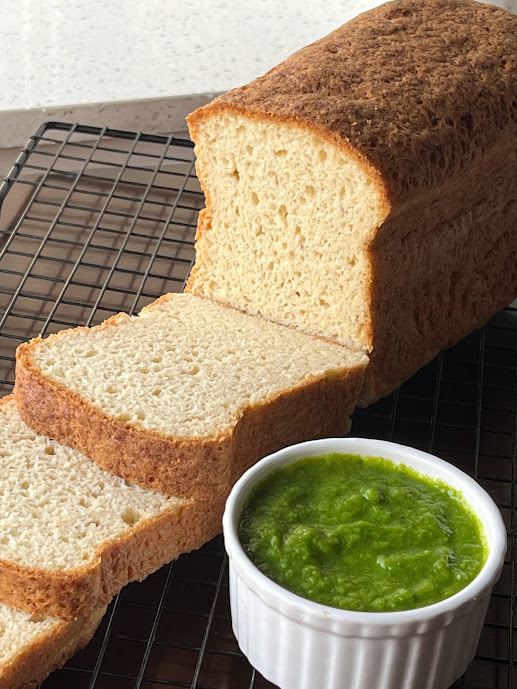
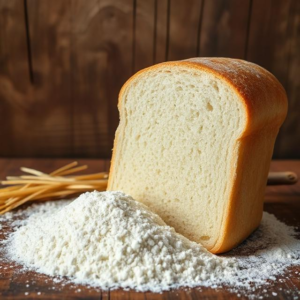
Welcome to this delightful gluten-free bread recipe, and the best part is, we’re ditching the common starches that many gluten-free bread recipes rely on like Tapioca Flour and Potato Starch. This unique recipe focuses on White Rice Flour that not only make your bread gluten-free but also bring in some essential nutrients. Let’s dive into a healthier and equally delicious way of making gluten-free bread! And as a bonus, we’ve covered a gluten-free green chutney recipe to enjoy with your fresh bread.
Gluten-free Grain Harmony Loaf
Ingredients:
- White Rice Flour: 150g (1 1/2 cups)
- Sorghum Flour (Jowar): 90g (3/4 cup)
- Instant Yeast: 9g (2 1/4 tsp)
- Powder Sugar: 60g (4 tbsp)
- Xanthan Gum: 6g (1 1/2 tsp)
- Baking Powder: 5g (1 tsp)
- Psyllium Husk: 25g (1/4 cup)
- Pink Salt: 6g (1 tsp)
- Unsweetened Almond Milk: 430g (1 3/4 cups)
- Virgin Coconut Oil: 60g (1/4 cup)
- Room Temperature Eggs: 2
- Apple Cider Vinegar: 1 tbsp
Notes:
1. Please note that the cup measurements are approximate and can vary based on how ingredients are packed into the cups. Weights (in grams) are often more precise for baking.
2. Avoid making ingredient substitutions in the recipe, as it will impact the appearance and texture of the bread.
Nutritional Insight: White Rice Flour and Sorghum Flour are not just substitutes; they’re nutritional powerhouses. White Rice Flour is a great source of carbohydrates and provides energy while being easy on the stomach. On the other hand, Sorghum Flour, also known as Jowar, is high in dietary fiber, protein, and various micronutrients like magnesium and phosphorus. This unique blend ensures your gluten-free bread is not only safe for coeliacs but also nutritious.
Method:
- Grease an 8”x4” loaf pan and line it with parchment paper, leaving some paper hanging over the sides.
- In a big bowl, sift together the White Rice Flour, Sorghum Flour, Instant Yeast, Powder Sugar, Xanthan Gum, and Baking Powder.
- Whisk these dry ingredients for about 2 minutes, using a wire whisk.
- Add Psyllium Husk and Pink Salt and whisk for 1 more minute.
- Preheat your oven to 100°C (212°F) for 3 minutes, then turn it off.
- To the dry mix, add the 45°C (115°F) Unsweetened Almond Milk, Coconut Oil, Eggs, and Apple Cider Vinegar.
- Use a beater on medium speed to whisk for 4 minutes until everything combines well.
- The batter should be soft.
- Pour the batter into the prepared loaf tin.
- Dip a spatula in water and use it to even out the top with gentle pressure.
- Cling wrap the loaf tin.
- Keep the loaf tin inside the preheated oven (switched off) for 30 – 40 minutes.
- Now remove the tin and preheat the oven to 190°C/ 374°F for 6 minutes.
- Remove the cling wrap and gently brush coconut oil on top.
- Bake for 40 – 50 minutes.
- Take the baked bread out from the oven, gently brush coconut oil on top of the hot loaf.
- Cool on the wire rack for 15 minutes, and then unmold and cool on the wire rack further for 2 hours. Cover with a towel to prevent the bread from drying.
- Approx weight: 750gms
- Remember to tag me and share your photos when you bake this fantastic gluten-free bread! Tagging ensures you won’t miss my upcoming recipes and baking journeys. And don’t hesitate to DM me to discuss your experience with this bread—I’m eager to hear from you! Let’s make gluten-free baking even more enjoyable together!
- Share this recipe! If you loved this recipe, share it with your friends and tag us on Instagram @https://www.instagram.com/cookery.expressions We’d love to see your creations!
Storing: Room temperature bread is soft, fluffy, and delicious tasting! For best results, slice and freeze the bread after it has completely cooled (at least 8 hours). Pull slices as needed from the freezer to defrost or toast from frozen. Once your gluten-free bread has cooled to room temperature, wrap it tightly in plastic wrap or aluminum foil to keep it from drying out. For added protection, you can even place it in a resealable plastic bag. If you plan to enjoy your bread within a few days, storing it at room temperature is just fine. However, if you want to keep it for longer, pop it in the freezer. Freezing your homemade bread can extend its shelf life by a few months. When the craving strikes, simply thaw it at room temperature or reheat it for that freshly baked taste. So, with proper care, your gluten-free bread can last anywhere from a few days to a few months, allowing you to savor your hard work for just the right moment. Enjoy!![]()


How to Use White Rice Flour in Gluten-Free Baking
Substituting for All-Purpose Flour
When using white rice flour as a substitute for all-purpose flour, it’s essential to understand that it behaves differently due to the lack of gluten. Here are some tips for effective substitution:
- 1:1 Substitution: In many cases, you can swap white rice flour for all-purpose flour in a 1:1 ratio, though results might vary.
- Mix with Other Flours: For best results, consider blending white rice flour with other gluten-free flours (like almond or coconut flour) to improve texture and flavor.
- Add Binders: To mimic the elasticity of gluten, add binders like xanthan gum or ground flaxseed. A standard guideline is 1 teaspoon of xanthan gum per cup of gluten-free flour used.
Recipes Incorporating White Rice Flour
- Gluten-Free Pizza Crust
- Combine 2 cups of white rice flour, 1 teaspoon of baking powder, and 1 teaspoon of salt in a bowl. Stir in 1 cup of warm water and 2 tablespoons of olive oil until a dough forms. Roll out and bake at 425°F (220°C) for 15–20 minutes for a crisp crust.
- Fluffy Pancakes
- Mix 1 cup of white rice flour, 1 teaspoon of baking powder, 1/4 teaspoon of salt, 1 cup of milk (or a dairy-free alternative), and 1 egg (or flax egg for vegan option). Cook on a skillet until bubbly and golden on both sides.
- Moist Banana Bread
- In a bowl, mash 3 ripe bananas and mix with 1/4 cup of melted coconut oil, 1/2 cup of maple syrup, and 1 teaspoon of vanilla extract. Stir in 1 1/2 cups of white rice flour, 1 teaspoon of baking powder, 1/2 teaspoon of baking soda, and a pinch of salt. Bake in a greased loaf pan at 350°F (175°C) for 50-60 minutes.
Answering Common Questions About White Rice Flour
What is White Rice Flour?
White rice flour is a flour made from finely milled white rice. It is a popular gluten-free alternative used in various recipes, particularly in Asian cuisines, pastries, and baked goods.
Can I Use White Rice Flour for Gluten-Free Pizza Crust?
Yes! White rice flour can be used in making gluten-free pizza crust. As noted in the recipe section, blending it with other gluten-free flours enhances texture and flavor for the perfect crust.
How Do I Store White Rice Flour?
Store white rice flour in a cool, dry place in an airtight container to maintain its freshness. For extended shelf life, consider refrigeration or freezing.
What Are the Benefits of Using White Rice Flour in Baking?
Beyond being gluten-free, it is easily digestible, low in fat, and provides unique textures and flavors to baked goods. Its high carbohydrate content contributes to energy, making it an excellent choice for various recipes.
Introducing the Perfect Accompaniment for Your Gluten-Free Grain Harmony Loaf: Gluten free Green Chutney!
This zesty Green Chutney is a match made in culinary heaven when paired with our delectable Gluten-Free Grain Harmony Loaf. The vibrant flavors of cilantro, green chilies, garlic, and a hint of lime juice come together to create a refreshing and tangy chutney. Whether you spread it generously on your freshly baked bread or use it as a dip, this chutney adds a burst of flavor to every bite.
![]() Ingredients:
Ingredients:
- Cilantro (Coriander) (roots and hard stems removed, rinsed well): 100 gms
- Green Chilies (roughly chopped, adjust according to your taste): 3-4
- Garlic: 4-5 cloves
- Chopped Onion: 100 gms
- Pink Salt (to taste): ½ tsp
- Ice-Cubes: 2- 3
- Freshly Squeezed Lime Juice: 2 tbsp
- Sugar: ½ tsp
Method:
- Add all the ingredients – Cilantro (Coriander), Green Chilies, Garlic, Chopped Onion, Pink Salt, and Ice-Cubes to a blender.
- Note – If required, use cold water sparingly, (1-2 tbsp) you don’t want a watery chutney.
- Blend until smooth. Scrape the sides of the blender a few times while blending.
- Tip – Sometimes, the herbs don’t come in contact with the blade of the blender and the blending process doesn’t start. In that case, push the herbs down with a spatula a few times.
- Pour the chutney into a bowl and lime juice and sugar.
- Check for salt and add more if required. Mix well.
- Serve the green chutney at room temperature or chilled.
- Brush the chutney on the Gluten-Free Grain Harmony Loaf and enjoy every bite.
And now, for the cherry on top – storing this delightful green chutney. It’s best enjoyed fresh and can be stored in an airtight container in the refrigerator for up to a week. The flavors may even intensify over time, making it even more irresistible. So, savor this culinary duo and elevate your gluten-free bread experience. Enjoy!
Comparison of Gluten-Free Flours: White Rice Flour vs. Others
| Gluten-Free Flour | Pros | Cons |
|---|---|---|
| Almond Flour | Higher in protein and healthy fats; adds a nutty flavor. | Can be dense and may affect texture in certain recipes. |
| Coconut Flour | Low in carbs and high in fiber; great for baking. | Absorbs moisture quickly; requires adjustments in liquid. |
| Oat Flour | Adds a mild flavor; high in nutrients. | Not suitable for some gluten-free diets if oats are contaminated with gluten. |
| White Rice Flour | Light texture; versatile; easy to digest. | Low in protein; may require blending for best results. |
Ready to Try White Rice Flour?
White rice flour is more than just a gluten-free alternative – it’s a versatile ingredient that supports healthy cooking and baking while being easy to digest, providing a smooth texture in recipes, and being naturally low in fat.

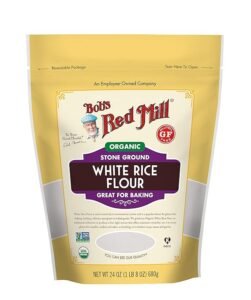
Looking for high-quality white rice flour? Check out my favorite brand here and and here and start reaping the health benefits today! From affordable white rice flour options to the best white rice flour for baking, you can easily find the perfect product online.
More Gluten-Free Recipes to Try:
Chocolate Gluten-Free Chickpea Brownies
Embark on a transformative gluten-free journey with our Online Gluten-Free Bread Class! Clicking on the link opens the door to a world of gluten-free and egg-free magic and delightful learning. For our gluten-sensitive readers, this is not just a class; it’s a gateway to:
- Expert Guidance: Access step-by-step video tutorials led by seasoned experts, ensuring a thorough understanding of gluten-free bread making.
- Tailored for You: Learn techniques specifically crafted for those sensitive to gluten, ensuring a safe and enjoyable baking experience.
- Delicious Results: Master the art of creating gluten-free bread that’s not just dietary-compliant but also delicious, so you never have to compromise on taste.
- Community Connection: Join a community of like-minded individuals, sharing experiences and tips, making the learning journey interactive and supportive.
- Fun and Enjoyment: Baking should be fun! Experience the joy of creating mouthwatering gluten-free bread, adding a delightful touch to your culinary repertoire.
Join our Incredible Online (Paid) Gluten-Free Bread Class with Video Tutorials – Where the Egg-Free Magic Awaits! Don’t Miss Out on the Fun!
https://cookeryexpressions.co.in/gluten-free-breads-no-maida-no-atta-eggfree/
✨Click here to watch the simple, step-by-step video tutorial of other amazing gluten-free bakes. Let’s bake up some joy together!
https://www.facebook.com/groups/glutenfreebakingmasterycommunity/
For more information on gluten-free dietary benefits, you can refer to: